 Almanac
User guide Getting started
Getting started
Almanac is a calendar and task manager that lives in your Mac's menu bar. This page walks you through installing it, the first launch and adding your first event. It takes about five minutes.
What you need
- A Mac with Apple silicon running macOS 14 Sonoma or later.
- Optional: macOS 26 on a Mac that supports Apple Intelligence, if you want Almanac to use Apple Intelligence for tricky sentences.
You don't need an account to try Almanac. It's free for 14 days from the first time you open it.
Install Almanac
- Go to the download page and download Almanac. It comes as a disk image (a
.dmgfile). - Open the downloaded file.
- Drag Almanac into your Applications folder.
- Open Almanac from Applications or Launchpad.
The welcome sheet
The first time you open Almanac, a welcome sheet helps you set up:
- Connect your calendars. Buttons for iCloud, Google, Microsoft 365 / Outlook, Fastmail and CalDAV let you add an account straight away. You can also skip this. An On My Mac calendar is ready to use immediately.
- Type like you talk. A few example sentences show what Almanac understands.
- Permissions. Click Allow for the things you want: notifications for alerts and meetings, Contacts for name suggestions and birthdays, and Location for weather and travel time. All of them are optional.
Click Start Using Almanac when you're done. You can add more accounts later in Settings › Accounts. See Connecting your accounts.
The menu bar icon
Almanac puts a calendar icon with today's date in your menu bar. Click it to open the mini window, which shows quick entry, your next events with a Join button, the month at a glance and your coming days.

Press ⌃⌥Space from any app to open the mini window without reaching for the mouse. To open the full calendar, click the menu button at the bottom of the mini window and choose Open Almanac. Views and the menu bar covers both windows in detail.
Your 14-day free trial
Every feature is unlocked for 14 days from the first launch. You don't need to sign up or enter a card. A banner shows how many days are left, and so does Settings › Licence.
When you're ready, a licence costs $5 a month or $50 a year for each Mac. See Licence and billing for how to buy and activate one. If the trial ends before you buy, Almanac keeps showing and syncing your calendars and you can still join meetings. Creating and editing events is paused until you add a licence.
Add your first event
- Open quick entry. You can click the + button in the main window's toolbar, press ⌘N, or use the quick entry field in the mini window.
- Type a sentence, for example
Lunch with Sam tomorrow 12:30-1:30pm at Blue Bottle. - Check the live preview. It shows the date, time, place, calendar and alerts Almanac understood.
- Press Return. The event is saved.
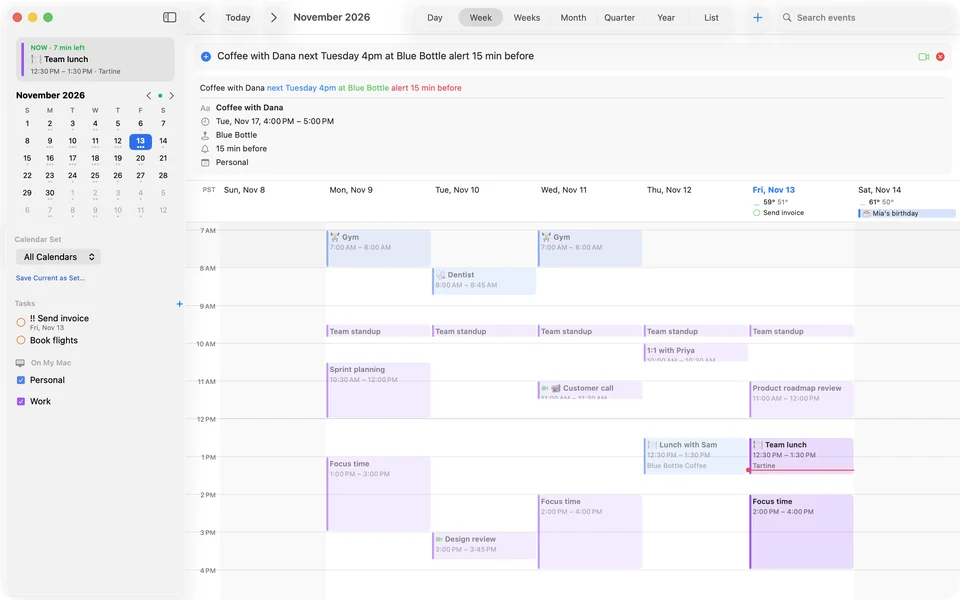
To make a task instead, start with todo, for example todo send invoice friday !!.
Where to go next
- Connecting your accounts: iCloud, Google, Microsoft 365, Fastmail, CalDAV, Todoist and more.
- Typing events in plain English: everything quick entry understands.
- Views and the menu bar: day, week, month, year and the mini window.
- Meetings and video calls: join buttons, Zoom, Google Meet and Teams.
- Licence and billing: buying, activating and managing your subscription.