 Almanac
User guide Connecting your accounts
Connecting your accounts
Almanac connects to each of your calendar and task services itself and keeps an offline copy on your Mac. It doesn't use the macOS Calendar app's accounts, so you add your accounts once in Almanac.
Add an account
- Open Settings › Accounts.
- Click the + button below the account list.
- Choose the type of account and follow the steps below.
Passwords and sign-ins are stored in your Mac's Keychain. Your events and tasks stay on your Mac.
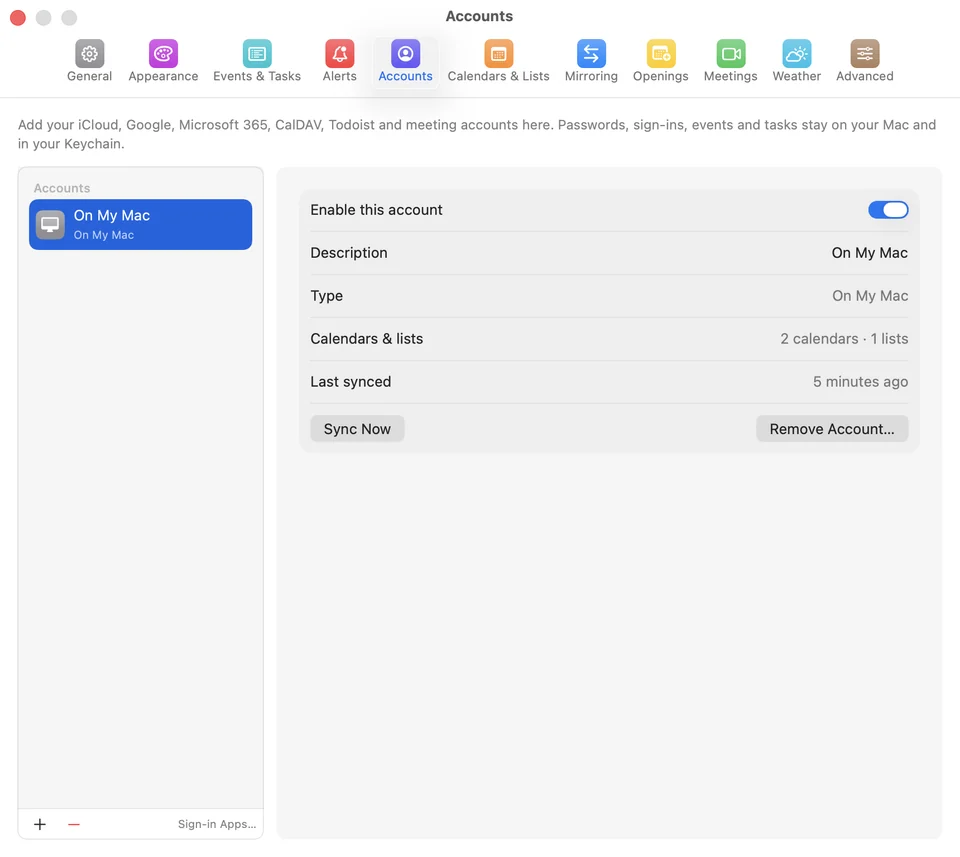
On My Mac
An On My Mac calendar is ready from the first launch. Its calendars and task lists are stored only on this Mac and aren't synced anywhere. You can add more On My Mac calendars from the + menu.
iCloud
Apple requires an app-specific password for apps like Almanac. Your normal Apple ID password won't work.
- Sign in at account.apple.com and create an app-specific password. You can name it “Almanac”.
- In Almanac, choose iCloud, enter your Apple ID and paste the app-specific password.
- Click Add.
Google Calendar and Google Tasks
- Choose Google and click Sign In….
- Your browser opens. Sign in to Google and approve access.
- Return to Almanac. Your calendars and Google Tasks lists appear.
If some Google calendars are missing, open the Google account in Settings › Accounts and use the Choose which calendars sync link.
Microsoft 365 and Outlook.com
Choose Microsoft 365 / Outlook and click Sign In…, then sign in with your work, school or personal Microsoft account in the browser. Almanac gets access to your Outlook calendar and Microsoft To Do.
Fastmail
- In Fastmail's settings, create an app password with CalDAV access.
- In Almanac, choose Fastmail, enter your user name and the app password, then click Add.
Nextcloud, ownCloud and other CalDAV servers
Choose Nextcloud or CalDAV and enter:
- Server: the server's web address, such as
cloud.example.comorhttps://caldav.example.com/dav. - User name and Password.
If your provider offers app passwords, use one here.
Todoist
- In Todoist, open Settings › Integrations › Developer and copy your API token.
- In Almanac, choose Todoist and paste the token.
Your Todoist projects appear as task lists, and tasks with due dates show in the calendar. See Tasks.
Subscribed calendars and holidays
Choose Subscribed Calendar, then either:
- paste a calendar address starting with
webcal://orhttps://(usually ending in.ics), or - pick a public holiday calendar from Choose a holiday calendar….
Subscribed calendars are read-only and refresh every hour.
Birthdays
Choose Birthdays to show birthdays from your Contacts, with ages when the birth year is known. Almanac asks for access to Contacts the first time.
Manage an account
Select an account in Settings › Accounts to see its details:
- Enable this account: turn an account off without removing it.
- Description: the name shown in Almanac.
- Refresh calendars: from every minute to every hour, or manually.
- Sync Now: fetch changes straight away.
- Remove Account…: removes the account and deletes its offline copy and saved sign-in from your Mac. Nothing is deleted on the service itself.
For Google and Microsoft accounts, Almanac can also suggest invitees from your contacts. If it can't read them, click Reconnect to allow contacts.
To change a calendar's colour or name, mute its alerts or ignore it when finding free time, use Settings › Calendars & Lists.